
 |
 |
Page Two

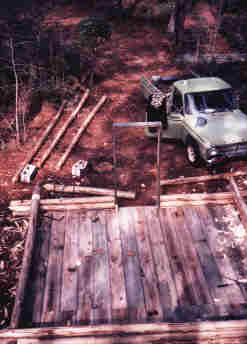 |
I always try to get the unique photographic angles on my projects, so here's an aerial view of the cabin site as I scaled a tall and narrow pine with no limbs. Hope that you appreciate it!! |
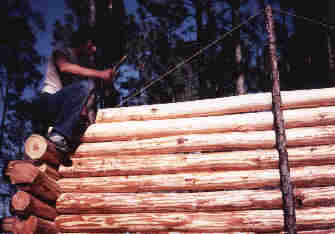
| Stacking logs one by one. I tried to get them to fit as tightly as possible by shaving off knots and high spots. | 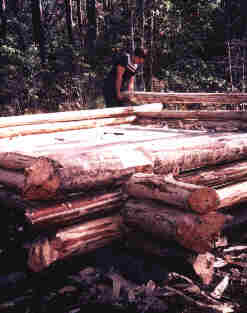 |
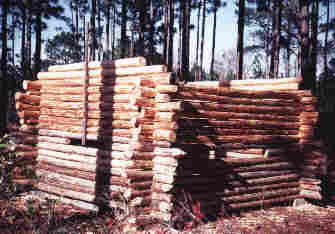
Cutting down the trees, loading and hauling to the building site, and skinning them is always the hardest part of building a "raw" log cabin from the good earth. But I can't imagine doing it any other way!
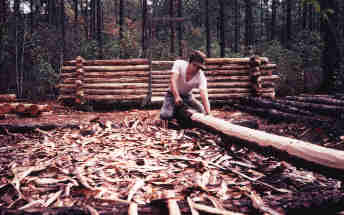
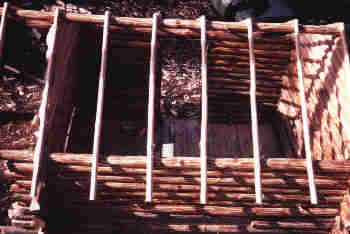
Finally 8 logs high and around half way done. Notice the gap in the rear wall that I intentionally left which will later make it a bit easier to cut out the space for a window.

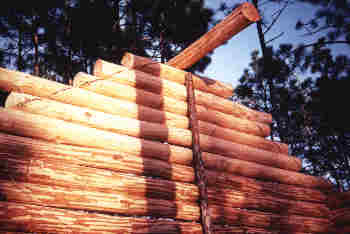
This and the following photos reveal a distinct change in construction. Can you find it? That's right, the lighter colored logs on top were from my second batch of logs which were cut smooth with a chainsaw. Although the first half of the cabin was built proudly with just an ax, I just couldn't resist buying a tiny 10" Homelite XL chainsaw when it went on sale for just $79.95!! Believe it or not, that same chainsaw is still running today almost 18 years later! Now that was a good investment!
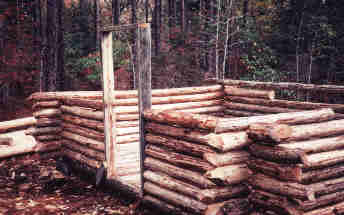
The Gable Ends
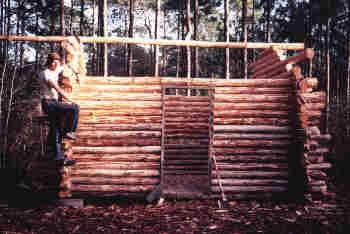
These next three pictures show how I did the gable ends.Once I had reached the desired wall height I nailed a small pine sapling directly on center on both of the side walls, then continued stacking logs on only these two walls. Yes, at this point I had to spike the logs so that they wouldn't roll away and since notching no longer provided strength and stability.
I then ran a piece of twine up to the apex of the sapling then secured each end as a guide to exactly where I wanted the pitch of the roof to be. Quite simple.
Once both gable ends were laid then I put the center ridge pole into place and popped a chalk line on the pitch of the roof (note black line) and sawed the logs off smoothly on that line.
Here's the center ridge pole before I trimmed the ends.
For your viewing pleasure, I scrambled up that little pine tree again to snap another aerial view of the rafters. It's now time to get a roof on this baby!
See the roof go on and the finished cabin... by clicking on to page 3!